Introduction to Qualtrics
The survey Builder will open automatically when you create a new project or select an existing one. It is used to create and edit your survey. When you leave this section later you can navigate back to it using the top icon in the menu on the left. The icon looks like a clipboard:

This page details the key functionality available in this section of Qualtrics.
In brief, it covers how to do the following:
- Add different types of questions to a survey
- Import questions from the Qualtrics library or from another survey
- Edit questions in a survey
- Renumber questions in a survey
- Organise survey questions into question blocks
- Add question behaviour to survey questions, including display logic and skip logic
- Customise the survey by piping text
- Customise the end of survey message
Adding survey questions
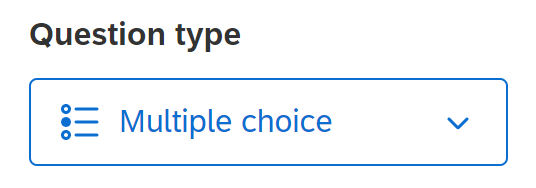
Each blank survey starts off with a blank Multiple choice question in the Default question block (see Question blocks for more information on these). You can change the type of this question by selecting it and choosing from the available question types using the Question type drop down list in the Edit question menu at the left of the screen:
Similarly, when you select Add new question you can choose from the list of available question types, and again you can always change this later. When using the Curtin Qualtrics licence, there is a large range of question types to choose from, as listed below. To learn more about a question type, click on the option you’d like to know more about:
- Multiple choice
- Text entry
- Text/Graphic
- Matrix table
- Slider
- Form field
- Rank order
- Side by side
- Net promoter score
- Timing
- Graphic slider
- Constant sum
- File upload
- Pick, group and rank
- Drill down
- Signature
- Heat map
- Hot spot
- Meta info
- Captcha verification
- Highlight
Example
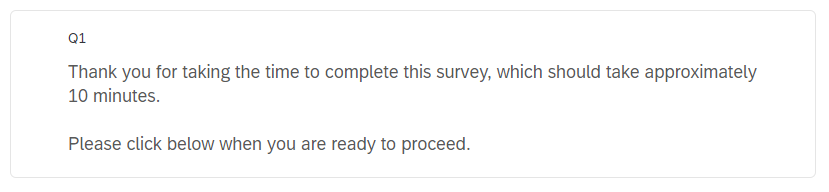
Change the blank Multiple choice question in the Test survey to the Text/Graphic question type using the Question type drop-down list in the Edit question menu. Then write a brief introduction to the survey, which in this case could look something like the following:
Next let’s add a couple of demographic questions. First, click the Add new question button below the introductory text and select the Text entry question type. Then write a question asking for the participant’s postcode. If you like, you can also adjust the size of the text box by hovering over the right hand side of the box and clicking and dragging the edge to make it smaller. (Note that another option would be to use the Form field question type for this. However, this question type is usually used when more than one text box is required - for example, to capture different fields of a participant’s address.)
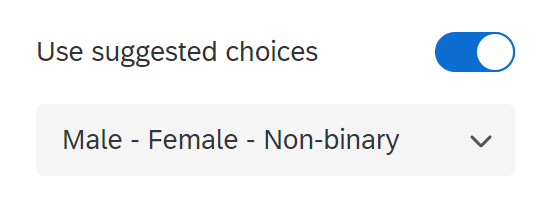
To add another question click the Add new question button below the postcode question, and this time select the Multiple choice question type. Write a question asking which gender the participant identifies as. After you do this, you will see that the choice options are populated with suggested choices. You can still edit, add or remove choices when using suggested choices, or you can select a different suggested choice (if relevant) from the Edit question menu at the left of screen. You can also use this menu to toggle on and choose from suggested choices if they don’t automatically appear.
Importing survey questions
In addition to the Add new question option, there is also the option to Import from library. This allows you to import a question either from the Qualtrics Library (which has a range of surveys and questions to choose from, including common demographic questions) or from any other survey you have previously created or had shared with you. It can save you a lot of time re-writing questions!

Editing questions
You can perform various question actions using the menu that appears when you select the three dots at the top-right corner of the relevant question. This menu provides options such as moving the question (which you can also do by dragging and dropping), copying the question, replacing the question with one from the library, adding a page break, deleting the question and previewing the question (which allows you to see what the question will look like to participants). Note that you can also add a page break by hovering below the question and selecting + Add a page break.
Additionally, you can make edits to a question by selecting it and choosing from the options that appear on the Edit question menu to the left of screen. These options vary according to the question type, but may include choosing the text type (e.g. single or multiple lines), allowing multiple answers, changing the number of choices, changing the formatting of the choices, adding requirements (such as forcing or requesting a response), adding validation, and adding question behaviour, as detailed below.
Example
In the Test survey, click the three dots to display the menu for the first question (the question where you have provided instructions). Then select Add page break to add a page break below it, so that these instructions appear on their own page.
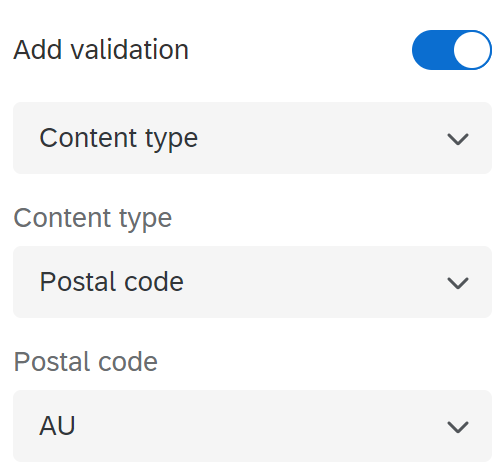
Next, let’s add some validation to the second question (the postcode question) to ensure the participant enters a valid postcode. To do this, click on the question and then use the Edit question menu on the left of screen to toggle on Add validation. Change ‘Minimum length’ to Content type using the drop-down menu, then choose Postal code from the new Content type drop-down menu, and AU from the new Postal code drop-down menu, as shown below:
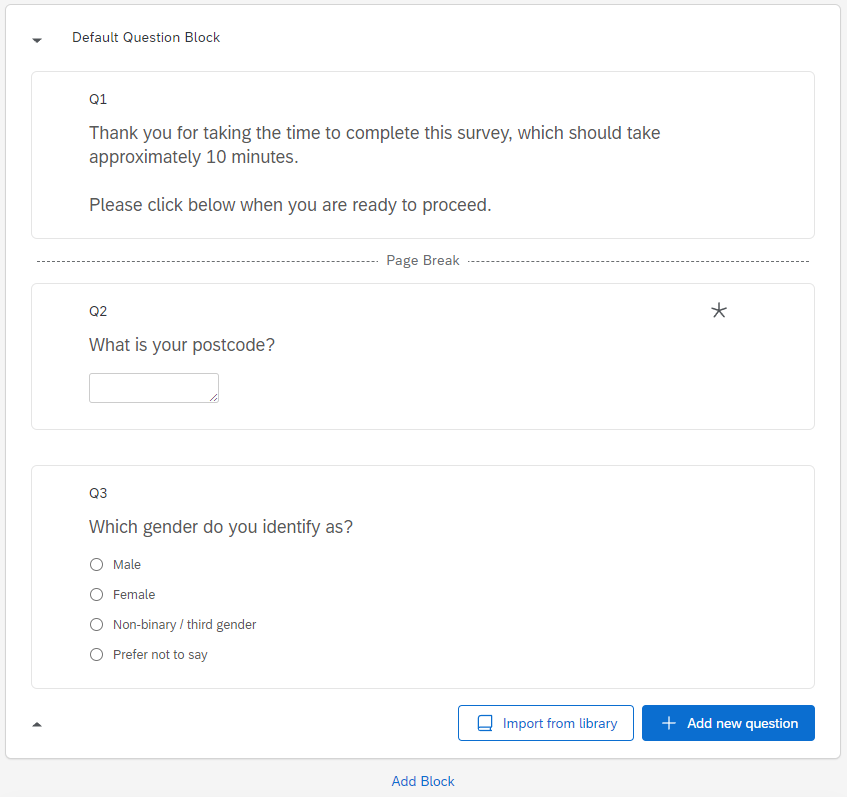
So far, your Test survey questions might look like the following in the survey builder:
You can also click the Preview button in the top-right to check that things will display as you expect for participants.
Renumbering questions
As you go about adding questions, you may notice that they are numbered in the order they are created, rather than the order in which they appear in the survey – meaning that if you add and then delete a question, or move questions around, the numbering will get mixed up.
The question numbers are not visible to participants (unless you make them visible through the Survey options) so it is not a problem in that respect, but if you would like to have the questions numbered in the correct order for organisational purposes, note that you can change a question number by clicking on it and editing.
Alternatively, you can automatically re-number questions at any time by selecting the Tools drop-down menu at the top of the survey, choosing Auto-number questions and selecting the type of numbering you wish to use.
Question blocks
Qualtrics surveys are organised into ‘blocks’ of questions, and each blank survey starts off with one Default Question Block. You can change the name of this block to a more meaningful name by clicking on it and typing (note that these names are not visible to survey participants though).
For a simple survey it is fine to just have one block of questions, but you may like to group questions in a longer survey into blocks – both for your organisational purposes, and so that the participant views them on separate pages (alternatively, you can add page breaks between questions in the same block to have them display on separate pages for the participant – see Editing questions). Another reason to use multiple blocks would be to customise the flow of your survey to do different things with different blocks of questions (see the Survey flow page of this module).
If you do want to add more question blocks to your survey you can do so by selecting the Add Block button, and you can reorganise any blocks you have created by selecting and dragging them to the appropriate spot in your survey. Alternatively, you can also perform these actions through the block menu, which you can view by selecting the three dots at the top right corner of the relevant block. This menu also provides options including Copy, Delete, Collapse questions (so you only see the questions, not any answer choices, in the survey builder) and Preview block.
You can also make other edits to the block by selecting it (make sure you select the block itself rather than a question within it) and choosing from the options that appear on the Edit block menu at the left of screen. Options provided here are Question randomisation and Loop & merge as well as Next/Previous button text. The latter allows you to enter text that will appear on any ‘Next’ or ‘Previous’ buttons in the selected block (to learn how to add a back button to your survey see Survey options). Note that if your survey contains multiple blocks and you would like them all to have the same ‘Next’ and/or ‘Previous’ text, it is recommended that you make this change for all blocks at once as detailed on the Look & feel page of this module instead.
Example
Click on the name of the block in your Test survey and type in Demographics to change its name.
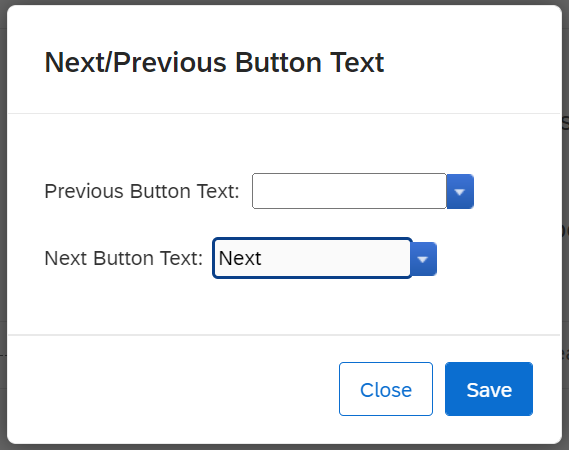
Select the block then click on Next/previous button text in the Edit block menu on the left of screen. Format the ‘Next/Previous button text’ so that the Next button reads Next for this block, as shown.
Finally, add another block below the ‘Demographics’ block by clicking on Add Block, then name the new block Travel Choices.
Question behaviour
You have the option to add different types of behaviour to each question you create in a survey. While this isn’t essential, and may not be required for a simple survey, you will often find that adding question behaviour helps to customise and improve your survey. For example, you could use a behaviour called Display logic to only display a question when a certain condition is met, and/or you could use a behaviour called Skip logic to skip the participant ahead to a future point in the survey based on their response to a question.
To edit the Question behaviour of a question, select a question you wish to edit and then choose the behaviour from the bottom of the Edit question menu at the left of screen.
The following sections provide more information and some examples for Display logic and Skip logic. Alternatively, to find out more about other types of question behaviour (noting that not all are available for each question type) click on the relevant link to view information on the Qualtrics support site:
Display logic
Display logic is used when you only want to display a question, or to display certain answers to a question, when a specified condition or conditions are met. The condition or conditions you set could be based on a number of things, but most often these are related to question responses, embedded data and quotas. While you can use display logic on any number of questions, note that if you want to skip the participant past a series of questions or to the end of a block or end of the survey, it will be more efficient to use Skip logic instead. Alternatively, if you want to conditionally display one or more blocks of questions it will be more efficient to use Branch logic instead.
To add display logic to a question, select the question you want to apply the logic to and then choose Display logic from the bottom of the Edit question menu at the left of screen. Alternatively, to apply display logic to part of a question (for example a choice for a Multiple choice question or statement for a Matrix table question), select the relevant part of the question and then use the drop-down menu to select Add Display Logic… Next, specify what you would like the logic to be based on (for example a Question, Embedded Data or a Quota), then make further selections as relevant. Note that you can add multiple conditions by pressing the + sign, and that you can choose to have a question displayed on the same page as previous question(s) by selecting the In Page option.
Further information can also be found on the Display Logic page of the Qualtrics support site.
Example
Let’s apply display logic to the Test survey, to allow us to conditionally display a question asking how many of the participant’s children are aged under 18. This question will only display if the participant answers yes to a previous question asking whether or not they have any children.
To do this, first add the question asking whether or not the participant has children, by clicking on the Add new question button, selecting the Multiple choice question type and then writing the question. The choice options will be populated with suggested choices, and you can reduce these to the required Yes and No options by reducing the Number of choices to 2 (in the Edit question menu at the left of screen). You may also like to select the Reverse order box (also in the Edit question menu at the left of screen) so that the ‘Yes’ response is listed first, if preferred.
Next, click the Add new question button again and add another Multiple choice question asking how many of the participant’s children are aged under 18. Enter five choices for this question: 0, 1, 2, 3 and 4 or more. This question should only display if the participant has previously indicated that they have children, so to enable this select the question and choose Display logic from the Edit question menu at the left of screen.
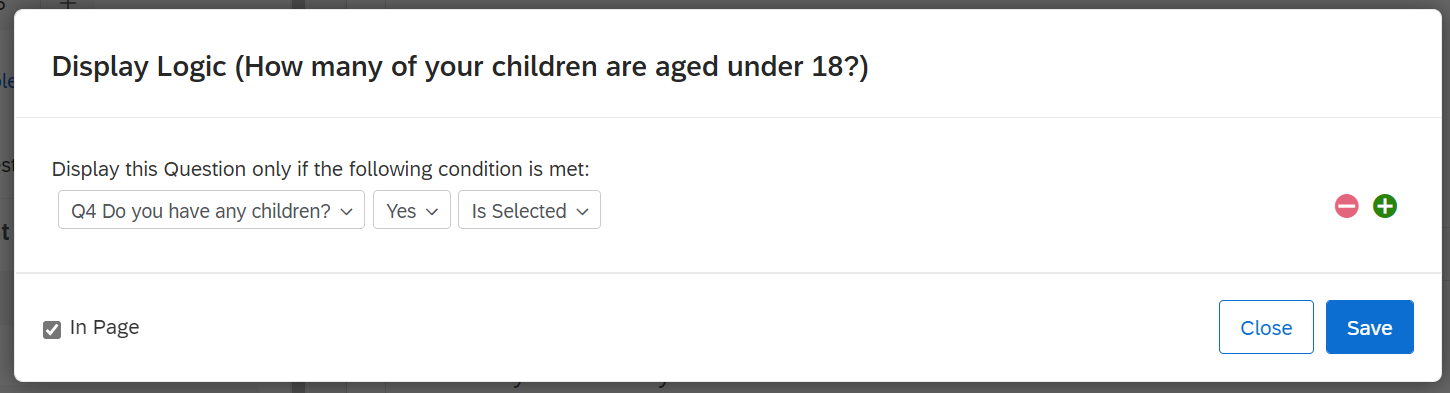
Now specify the condition that needs to be true in order for the question to display. To do this, keep the first drop-down box as Question and then select the Do you have any children? question in the second box. Choose Yes and Is Selected in the following boxes. Additionally, tick the In Page box so that the question appears on the same page as the previous question when the participant views the survey. Finally, select Save. Your ‘Display logic’ options should look like this:
If you preview the survey, you should see that the number of children question only appears when you answer ‘Yes’ to having children.
Skip logic
Skip logic enables you to skip the participant to a later part of the survey based on their response to a question. Participants can be skipped ahead to a question in the current block, to the end of the current block, or to the end of the survey. Depending on what exactly you’d like to do, sometimes you might find that you also need to use Branch logic or Display logic after skipping the participant to the end of a block, in order to navigate them to a particular place in the survey.
Further information can also be found on the Skip Logic page of the Qualtrics support site.
Example
Suppose that you would like to start your Test survey with a question that asks the participant whether or not they are willing to provide demographic information. If they are, they will proceed to the next question as normal. If not, they will be skipped to the end of the ‘Demographics’ block. To do this, first click on the Add new question button, then select the Multiple choice question type and write a question asking the participant if they are happy to answer some demographic questions, with Yes or No response options.
Either select and drag the question or use the Move question option in the question menu (accessible by selecting the three dots at the top-right corner of the question) to move the question so that it sits below the first question’s page break, above the question asking for their postcode, then click to + Add a page break below it as well. Note that you can also use the Auto-number questions feature in the Tools drop-down menu at the top of the page to automatically re-number the questions at this point if desired.
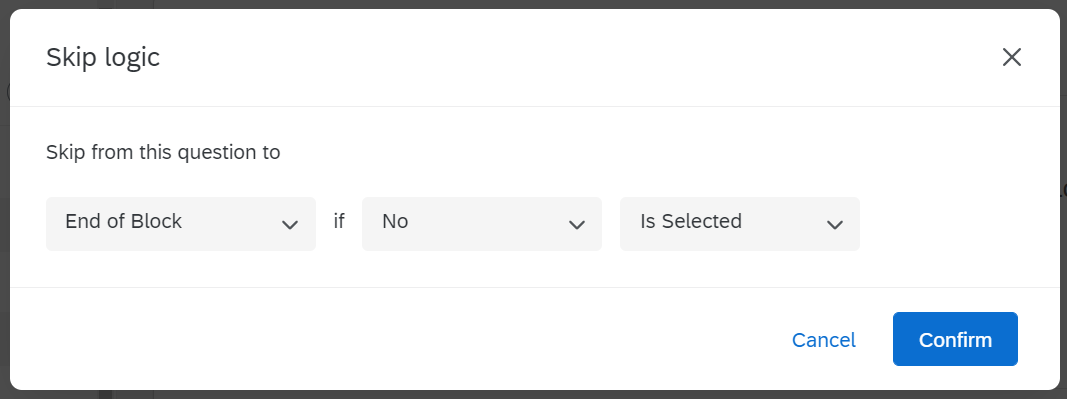
To add skip logic to this new question, select the question and choose Skip logic from the Edit question menu at the left of screen. Now specify where the participant should be skipped to and when, by choosing End of Block in the first menu, if No Is Selected. Press Confirm. Your skip logic should look like this:
If you preview the survey, you should be skipped to the end of the ‘Demographics’ block (which is currently the end of the survey as there are no further questions) if you answer ‘No’ to the question about demographics.
Piped text
Piped text allows you to customise your survey to include words, phrases or values that have been sourced from various places – such as a participant’s response to a question or their score (see Scoring for information about scoring). To add piped text, click on a question as though you were editing the text and then select the Piped Text… tab. You can then choose where you would like to pipe from and which text you would like to pipe.
Example
Let’s ask the participant where they would most like to go on holiday, then use their answer in a follow up question to ask about their choice. To do this, first click on the Add new question button, then select the Text entry question type and write a question asking the participant where they would most like to go on holiday. You may like to force a response to this question, to ensure you receive an answer, by toggling on Add requirements and keeping Force response selected (in the Edit question menu at the left of screen). Next, click on the Add new question button and select the Text entry question type again, then click to + Add a page break between the two questions.
The second question will ask what appeals to the participant most about their selected holiday destination, using piped text to include the name of the destination specified in response to the previous question. To do this, type the first portion of the question (e.g. ‘What appeals to you most about’), then when the piped text from the previous question’s answer is required select the Piped Text… tab and choose Survey Question. Navigate to the question asking where they would like to go on holiday, and then select it again. Finally, add a question mark after the piped text to complete the question. The questions in the Travel Choices block should now look like the following (note that the question ID may be different in your piped text):

Preview the survey to check that this has worked correctly, or alternatively just preview the ‘Travel choices’ block by choosing the Preview block option from the block menu (accessible by selecting the three dots at the top-right corner of the block).
End of survey message
The default message that participants will see when they finish completing a survey is as follows:

Sometimes you may wish to change this though, to provide a customised message, to redirect to a URL, or to include a response summary. You can do this by selecting the End of Survey block, then changing the End of survey message from Default in the Edit end of survey menu at the left of screen. If you choose to add a custom message you can load a saved message from your message library, or you can scroll down past any existing messages and select New Message to create a new one.
If you want to make edits to a custom message you will first need to choose Library from the drop-down menu at the top of the screen (to the left of the survey title):
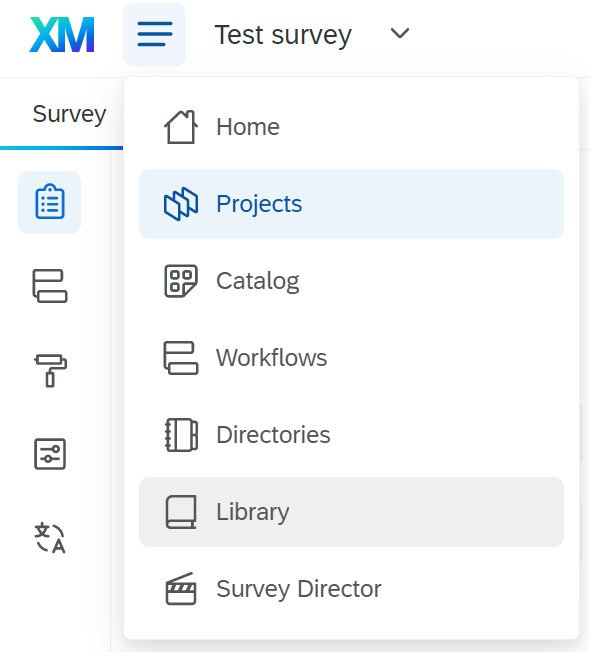
Next, choose Messages Library from the tabs at the top, select the message that you want to edit, select Edit, make the required changes and then press Save. When you are finished, navigate back to the project by selecting Projects from the drop-down menu at the top of the screen (the one used previously) and choosing the appropriate project.
If you wish to provide the participant with a summary of their responses, you should select Include response summary from the End of survey message menu instead. Participants can then download their responses as a PDF if wished.
Example
Let’s change the end of survey message in the Test survey to a custom message. To do this, select the End of Survey block and choose Custom message from the End of survey message menu at the left of screen. Choose My Library from the Load a saved message drop-down box, then select New message. Type a description, for example ‘Test survey end message’, then type a customised message and press ‘Save’.