Introduction to Qualtrics
You will need to access Qualtrics differently depending on your role and how you intend to use it.
Academic staff and Students
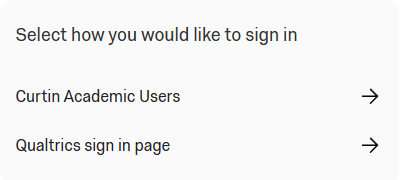
If you are conducting academic surveys, access Qualtrics via the Academic Users page and select “Curtin Academic Users” from the sign-in selection screen:
Non‑academic staff
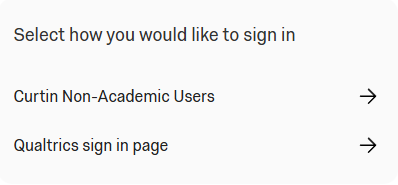
If you are conducting non‑academic surveys (for example marketing, events, engagement, or operational surveys), access Qualtrics via the Non-Academic Users page and select “Curtin Non-Academic Users” from the sign-in selection screen:
If you are unsure which category your survey falls under, please log a request with DTS for assessment and guidance.
Once you have logged into your account you can get started working on a survey, as detailed in this page.
In brief, it covers the following:
- How to create a new survey, either from scratch or by using a guided project or template
- How to collaborate on a survey with others
Creating a new survey
To create a new project, select the Create a new project button on the bottom-left corner of the screen. You will then be presented with a few different options for your project:
- Guided projects are pre-built projects, with step-by-step instructions
- Sample projects are sample surveys and data you can use to test things out
- Project templates are templates relating to different subject matter
- Academic project templates are education specific, pre-built templates
There’s also an option to start a project From scratch. Under this heading there are two options, Survey and Imported Data. The survey option allows you create a survey, while the imported data option allows you to import data from outside the Qualtrics site and analyse it.
To create a new survey from scratch, underneath From scratch choose Survey and select Get started from the bottom right hand corner. You will then be prompted to give your survey a name, and to select which folder to store it in (if relevant). You can also choose how you would like to start the survey. These options include:
- Create a blank survey project which allows you to create a survey completely from scratch.
- Import a QSF file which allows you to import a ‘Qualtrics Survey Format’ file from another Qualtrics account.
- Copy a survey from an existing project
- Use a survey from your library
Example
To create a test survey for use with this module, name the survey Test survey. Save it in the default Projects and Programs folder (or choose another folder if wished), choose Create a blank survey project and then select Create project.
Collaborating on a survey
Another option is to work on a survey that has already been created by someone else. In order to do this, they will need to add you as a collaborator. Once they have done this, their survey should be displayed in your list of projects (open the Projects page and select Shared with me from the left hand menu to more easily locate any projects that have been shared with you, if required). Once you have access to the project, simply select the project to open it and work on it.
Alternatively, if you would like to share a project with someone else you will first need to locate the project in your list of projects. Once you have done this, click on the three dots to the right of the project name and choose Collaborate, then search for the person using their name or staff or student ID. Once you have found them click Add Selected, then select Invite (add an optional custom message first, if you like).