Introduction to NVivo
This page details how to set up your own project in NVivo by importing and organising your project materials.
In brief, it covers how to do the following:
- Create a new project in NVivo
- Create folders to organise project materials
- Import materials saved on your computer into an NVivo project
- Import survey data into an NVivo project
- Import web content into an NVivo project
- Import EndNote references into an NVivo project
- Import emails into an NVivo project
- Open and edit project materials
- Create a picture file from a PDF
Note that this page includes a number of examples that make use of materials from the Environmental Change Down East sample project. While you can follow these examples using your own materials, if you would like to import the specified materials then you will first need to export them. You can do this by opening the Environmental Change Down East sample project (as detailed in the Sample projects page), then:
- To export the required Word documents: Select the Interviews folder under Files. Select the Margaret and Maria and Daniel files together, then right click and choose ‘Export’ and ‘Export Documents…’. Make sure the ‘MS Word (*.docx)’ file type is selected, choose an appropriate save location and then select ‘OK’.
- To export the required audio file: Select the Interviews folder under Files. Select the Helen file, then right click and choose ‘Export’ and ‘Export Audio/Transcript…’. Select to export the Media Item (.mp3) only, choose an appropriate save location and then select ‘OK’.
- To export the required PDF: Select the Literature folder under Files. Select the Analyzing Estuarine Shoreline Change~ A Case Study of Cedar Island, North Carolina file, then right click and choose ‘Export’ and ‘Export PDF…’. Choose an appropriate save location and then select ‘OK’.
- To export the required Excel file: Select the Survey folder under Files. Select the Survey Responses file, then right click and choose ‘Export’ and ‘Export Dataset…’. Choose an appropriate save location and then select ‘OK’.
Creating a new project
To create a new project in NVivo go to File > New, then enter a name and description for your project and browse to choose a location to save it in (it will save as a .nvp file). For example:

Click ‘Next’. You now have the option to choose ‘Yes’ or ‘No’ for a reminder to save your project. Click ‘Create project’, then click ‘Skip Tour’ and ‘Close’ for the information given under Files (once read).
Creating folders
It is generally easiest to create folders to store your project materials before you import them, as you can then import them straight into the appropriate folder. However, note that you can create new folders, move materials from one folder to another (by simply dragging and dropping), and delete folders or materials (by right clicking on them and selecting ‘Delete’) at any time.
To create a new folder, for example an Interviews folder, do the following:
- Right click on the Files folder contained in the ‘Data’ group (or if you would like the new folder to be a sub-folder of a different folder, right click on that instead)
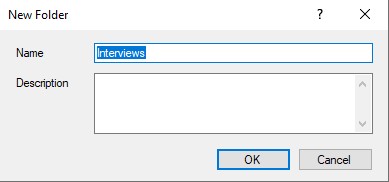
- Select ‘New Folder…’ from the top of the list, and the ‘New Folder’ dialog box will appear
- Enter a name for your new folder (for example Interviews), and a description if required
- Click ‘OK’ and then ‘Close’ for the information given under Files
(Alternatively, you can create a new folder by clicking on the Files folder, or another parent folder of choice, selecting the ‘Create’ tab on the ribbon at the top of the screen, and then selecting ‘Folder’.)
Repeat this process to create folders titled Literature, Surveys, Web Content, Email Content, and Pictures, plus a sub-folder of Literature called EndNote, so that the folders for your project files are as follows:
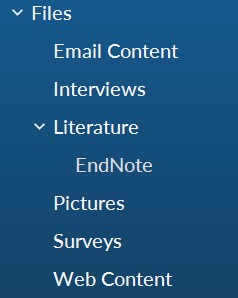
You can now import files directly into the folders you have created, as explained in the next sections.
Importing materials saved on your computer
The simplest materials to import into your project are Microsoft Word, text, PDF, audio, video and/or picture files saved on your computer. To import files of these types, do the following:
- Select the folder you wish to import the files into (for example Literature), so that the folder opens in the List View (close the information about Files)
- Right click in the blank area in the List View
- Select ‘Import Items…’
- Locate the file/s you wish to import (for example Analyzing Estuarine Shoreline Change), then import either by:
a. selecting the individual file and clicking ‘Open’ (as in this case); or
b. selecting multiple documents and clicking ‘Open’ - Click ‘Import’
- When importing an individual file, a ‘Properties’ box will appear giving you the opportunity to rename the item and to provide a description and colour if desired (note you can still do this for items imported as part of a group by right clicking on the relevant item in the List View, then selecting ‘Document Properties…’ or ‘Video Properties…’, etc. as applicable)
(Alternatively, you can import an item into a folder by clicking on the appropriate folder, selecting the ‘Import’ tab on the ribbon at the top of the screen, and then selecting the ‘Files’ option.)
Once you have done this, repeat the process for the Interviews folder, this time importing the Margaret and Maria and Daniel files together.
Importing surveys
You can create data sets in your project by importing Microsoft Excel spreadsheets, text files with comma or tab separated values and/or results from SurveyMonkey or Qualtrics. When you you do this, note that not only is the survey data set created in the relevant folder (in Files in the ‘Data’ group), but ‘codes’ are created for the responses to each open-ended question (in Codes in the ‘Coding’ group), and ‘cases’ and ‘case classifications’ are created for each survey respondent (in Cases and Case Classifications respectively in the ‘Cases’ group). Codes are covered in the Codes & coding page of this module, while cases and case classifications are covered in the Classifications page.
In the meantime, to import an Excel file do the following:
- Select the folder you wish to import the data set into (for example Surveys)
- Right click in the blank area in the List View
- Select ‘Import Survey’, and choose where you wish to import from (for example ‘From Microsoft Excel File…’)
- Locate the file you wish to import (for example Survey Responses.xlsx) and click ‘Open’
- Navigate through the Survey Import Wizard. While you can keep the default settings if importing the example survey data, note that the wizard gives you the opportunity to:
- Specify the number of header rows and the format of any dates in the survey data
- Specify the name of the folder to store the cases in, and select a survey variable to be a unique ID for these
- Specify a name for the case classification the cases will be grouped together in
- Identify open and close-ended questions in the survey, and any you don’t wish to import
- Choose whether to autocode themes and sentiment
(Alternatively, you can import survey data into a folder by clicking on the appropriate folder, selecting the ‘Import’ tab on the ribbon at the top of the screen, and then selecting the appropriate option in the ‘Survey’ group, for example ‘Excel’.)
For more information on preparing a Microsoft Excel spreadsheet for importing and on importing other types of data sets, you may like to view the NVivo User Help - Surveys and datasets online help.
Importing web content
You can import web content (for example articles, blog posts or social media content) into your project using a free web browser extension called NCapture for Google Chrome, which may well have been included with your NVivo download. To check, open Google Chrome and look for the NCapture icon to the right of the address bar:

If the icon is not visible try clicking on the ‘Extensions’ icon (the puzzle piece). If NCapture is listed as an extension, choose to pin it to the toolbar. If it is not listed, you can search for the extension by clicking on the ‘Customize and control Google Chrome’ icon (the three vertical dots to the right of the address bar), then selecting ‘More tools’ and ‘Extensions’. Search for the ‘NCapture’ extension and if it is listed, move the switch to the right so that the icon is visible, then pin it to the toolbar.
If you find that NCapture is not installed for Google Chrome, you can download it from the Chrome Web Store.
Alternatively, if you would like more information about NCapture you may like to view the NCapture online help.
Once you have NCapture installed for your chosen web browser, open the browser and locate a web page that you would like to import. For example, in keeping with the sample project you may like to import the web article North Carolina’s Fishing Industry Catches Up to a Changing World.
You can import this or another item of web content into NVivo using NCapture by clicking on the NCapture for NVivo icon. The NCapture dialog box will then open as follows:
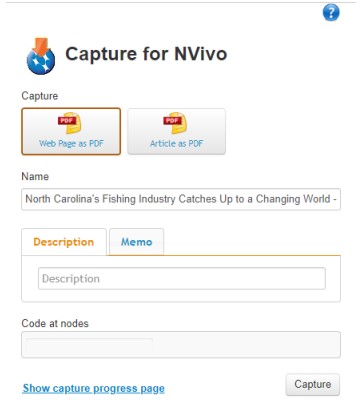
Note that you can choose to save an article either as a PDF of the web page or as a PDF of just the article, the latter of which should remove any additional, unnecessary content (other types of web content will have different source type options). Once you have made your selection, check that you are happy with the source name (amend if not), add a description if desired and click ‘Capture’ (you can also code to either new or existing codes if wished).
Once you have captured the web content in this way, you can import it in NVivo as follows:
- Select the folder you wish to import the web content into (for example Web Content)
- Right click in the blank area in the List View
- Select ‘Import from’, and choose ‘Import from NCapture…’
- Click ‘Browse’ to locate the web content you just captured (for example in your Downloads folder)
- Select the item(s) you wish to import
- Click ‘Import’
(Alternatively, you can import web content into a folder by clicking on the appropriate folder, selecting the ‘Import’ tab on the ribbon at the top of the screen, and then selecting the ‘NCapture’ option.)
Importing from EndNote
Importing EndNote references into NVivo is a two-step process, which first requires exporting them from EndNote. Instructions for both steps are provided below, and these make use of a sample EndNote library containing references for seven journal articles (with attached PDFs) and a book. If you wish to work through the instructions using the sample library you can download it from the following link (alternatively, you can make use of your own EndNote Library):
Once you have identified and opened an EndNote library, you can export references from it as follows:
- Select the references to export into NVivo (for the sample EndNote library provided this will be all eight references; for a large library it can take some time to import into NVivo, so it is recommended that you work with smaller groups of references at a time)
- Go to File > Export…
- Give an appropriate name for the file (or leave as is) and choose a location that will be easy to find (for example your Desktop)
- Save as a .xml file by using the drop down arrow at ‘Save as type:’
- Adjust the referencing ‘Output style’ if required
- Click on ‘Save’
The second step of the process involves importing the references into an appropriate folder in NVivo, as follows:
- Open Files or one of the folders you have created (it doesn’t matter which) in the List View
- Right click in the blank area
- Select ‘Import from’, and choose ‘Import from EndNote…’
- Browse to the .xml file and select ‘Open’
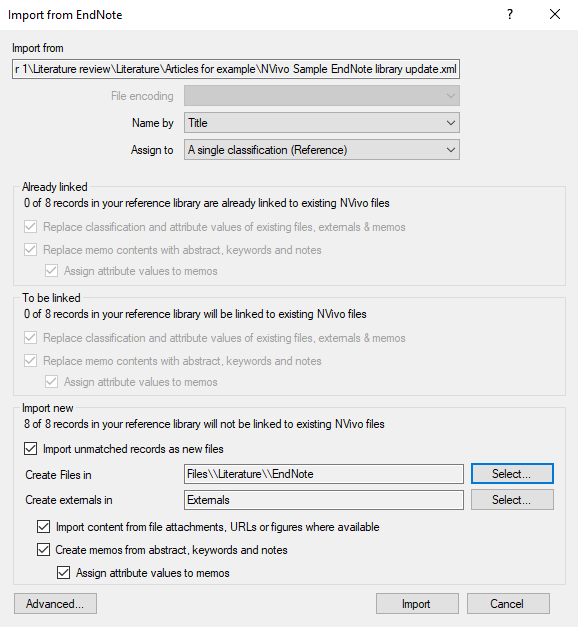
- Choose whether to name the records by ‘Title’ (the default option) or by ‘Author and Year’ in the ‘Name by’ option
- Choose whether to assign all the records to ‘A single classification (Reference)’ (the default option; this creates one ‘Reference’ file classification for all references) or to ‘Different classifications based on record type’ (which will create different file classifications for each type of reference, for example ‘Journal Article’, ‘Book’, ‘Report’, etc.) in the ‘Assign to’ option
- Check that the number of records coming into NVivo is correct (the figure below shows 8) and choose the appropriate folder at ‘Create Files in’ (for example Files\Literature\EndNote)
- Click on ‘Import’
Some additional things to note about the import process are as follows:
- NVivo recognises when records have previously been imported and will not import duplicates.
- Only one file attachment, URL or figure per reference can be imported into NVivo. If a reference contains multiple file attachments then by default the first file attachment is imported. If you want to import a different file, click the ‘Advanced…’ button (on the import dialog box) and select the file you wish to import for that particular reference using the drop down arrow in the ‘Import Content’ column.
- Changes you make to your EndNote library or your NVivo project will not automatically make changes in the other.
Furthermore, note that when EndNote references are imported to NVivo the following happens:
- References with attachments (such as word documents, text files and PDFs) will be stored in the specified folder in Files (for example the references with PDFs in the sample EndNote library have gone into the EndNote folder for the example above).
- References without attachments will be stored in the Externals folder. By right clicking on an external reference in the List View, choosing ‘External Properties…’ and selecting the ‘External’ tab, you can retrieve the reference. The ‘General’ tab shows the abstract (if applicable). You can also select the ‘Attribute Values’ tab to view the reference information (also available as per below).
- Referencing information will be stored in the File Classifications folder, either in one ‘Reference’ classification or in different file classifications, depending on what was selected in step 6 above. These can be seen in the List view when File Classifications is selected in the Navigation View, and new attributes can be added to a reference type as required (see the Classifications page of this module for details).
- Abstracts, keywords and notes for applicable references will be stored in memos. To view these, click on the ‘Notes’ group in the Navigation view then on Memos, and double click on any item you wish to open. Alternatively, open the folder containing the PDF or reference in the List View, then right click and choose ‘Memo Link’ and ‘Open Linked Memo’ (if there is one). You can also add additional notes of your own to these memos; for details on this see the Memos page of this module.
Importing from Microsoft Outlook
If you use the desktop version of Outlook (as opposed to Office 365 on the web) you can import emails into NVivo quickly and easily, either by dragging the email into the appropriate folder in the List View in NVivo or by saving it as a .msg file in Outlook and then importing it. Either way it will be imported as a PDF, and any associated email attachments will also be imported and saved in a folder called Email Attachments (except for Excel files, which need to be saved first and then imported, and any unsupported file types). This new folder will be a sub-folder of the folder where you imported the email, however you can then move the attachment(s) to another folder (and delete unnecessary folders) if preferred.
Importing emails in this way will also create a ‘file classification’ for the email and ‘cases’ and ‘case classifications’ for the sender and the recipients (note that classifications are covered in the Classifications page of this module), as well as ‘relationships’ between the sender and the recipients (in Recipients in the ‘Coding’ group). For more information on how to import emails in this way, the results of the process and how to work with them, you may like to view the NVivo User Help - Email online help.
Alternatively, you can import email attachments without the associated email as follows:
- Select the folder you wish to import the attachment into in NVivo (for example Email Content)
- Open the email with the attachment(s) that you wish to import
- Drag the attachment(s) into the List View of the appropriate folder
Opening and editing project materials
To open project materials once you have imported them, open the appropriate folder in the Navigation View (if required) then double click on the file in the List View. It will then open in the Details View on the right. Note that you can open multiple files at once if you wish, navigating between them by clicking on the tabs at the top of the Details View.
To edit a document (not a PDF) that is open in the Details View, tick the ‘Edit’ box. Once you have done this you can make any changes you wish to the editable document. Additionally, you can run a spell check on the document by selecting the ‘Spelling’ option in the ‘Edit’ tab on the ribbon at the top of the screen.
You can also turn any pictures found in PDF files into files of their own, if required. For example, to turn the large Figure 3 on page 821 of the Analyzing Estuarine Shoreline Change PDF into a picture file, do the following:
- Right click anywhere in the document and choose ‘Selection Mode’, then change it to ‘Region’
- Click on the appropriate picture in the PDF file so that it is selected (surrounded by a dotted line)
- Right click and select ‘Copy’
- Select the folder where you want to place the new picture file from the list of folders in the Navigation View (for example Pictures)
- Right click in the blank area in the List View for that folder
- Select ‘Paste’
- Enter a name for the picture, and a description if you wish, and click ‘OK’
Once you have done this, you can comment on a particular area of a picture by selecting it, right clicking and choosing ‘Insert Row’. The coordinates of the selected region will then automatically be entered in the ‘Region’ column, and you can type any comments in the ‘Content’ column. When the number(s) assigned to a particular row(s) is selected at a later date, that region of the picture will be highlighted.