Introduction to SPSS
When using SPSS to help with your statistical analysis it is highly likely that you will already have your data in some other electronic format, for example in Excel or in an online survey tool such as Qualtrics. If this is the case you do not have to enter your data manually into SPSS, and instead should just ensure that your variables are set up correctly. If you do not already have it in an electronic format though, you will need to enter the data as well as set up the variables.
In brief, this page covers the following:
- How to open, import or create a new dataset in SPSS
- The key components of the Data Editor window
- How to set up variables in an SPSS dataset
- How to enter and save data in an SPSS dataset
Opening a dataset
If you will be entering data from scratch, as per the example, you should get started by opening SPSS, selecting New Dataset and pressing Open.
Alternatively, you may wish to import data from another source such as Excel, SAS or Stata. In this case you can open SPSS, select the Recent Files tab, select Open another file… and press Open (or double click). Then change the Files of type field to the required type (for example to Excel Data), navigate to the required file and select Open. Finally, make any necessary selections for that particular source in the dialogue box that appears.
Similarly, if you wish to import data from an online survey tool such as Qualtrics you can do the same thing, you will just need to export it from the survey tool first. Some tools will have the functionality to export to an SPSS data file (as Qualtrics does), in which case you won’t need to change the file type or make any additional selections when following the instructions given previously. If this is not possible though, you can export to Excel instead and proceed exactly as described.
Finally, note that you can open any relevant data file at any time once you are already in SPSS, by going to File, Open, Data and then locating, selecting and opening the file (adjusting the Files of type field if required). If you are opening a non-SPSS file, you also have the option of doing the same thing by going to File, Import Data and choosing the relevant source.
The Data Editor window
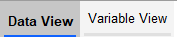
Regardless of whether you are using a blank or existing data set, the Data Editor window (which looks like a spreadsheet) should open in SPSS. This window has two parts; the Data View and the Variable View. You can move between them by using the tabs in the bottom left hand corner of the data window:
The Data View is the actual data itself, where all the information for each case (often a person) goes across a row, and each column represents a variable. Accordingly there will be as many rows as there are people/cases/questionnaires, and as many columns as there are variables. The maximum number of variables that can be set up in any data file is 35,000, while the number of cases is virtually unlimited.
The Variable View contains the specifications for the variables. For example, the variable name, variable label, category labels, etc. In the Variable View the information for each variable goes across the rows, so there will be as many rows of detail as there are variables in the data file. While SPSS does not actually require anything to be done before data is entered in the Data View, for ease of use when entering data and then when specifying the analyses to be performed, some user supplied information in the Variable View is beneficial and highly recommended. Likewise, if you already have data in the Data View (e.g. imported from Excel or Qualtrics), it is highly recommended that you check the variable settings in the Variable View and make any necessary changes before proceeding with analysis.
Setting up variables
The data to be entered into SPSS for the examples in the first few pages of this module comes from the following simple survey:
SAMPLE QUESTIONNAIRE
Please complete this questionnaire by circling your response or by writing your answer on the line provided. Thank you for your co-operation in providing the information.
-
How old are you?________
-
Which gender do you identify as?
Male Female Non-binary Prefer not to say Prefer to self-describe:________
-
Do you have any children?
Yes No
-
What is your household’s average daily energy consumption (in kWh) in summer?________
-
What is your household’s average daily energy consumption (in kWh) in winter?________
-
How many people live in your household?________
-
Would you like to reduce your household’s energy consumption?
Strongly disagree Disagree Neutral Agree Strongly agree
As each of these questions only allows for one response, there will be one variable per question and hence seven variables. Note, however, that variables which allow multiple responses will need to have one variable for each possible response. To set up these seven variables, or any others, in your SPSS data file, click on the Variable View tab at the bottom of the spreadsheet and then work through the following sections:
Naming variables
The first thing to do when setting up variables in the Variable View is to give each one a name. This should be representative of the individual item of data, and each one has to be unique. Whilst variable names can be anything you choose, and are not case sensitive, there are some rules to follow:
- The maximum number of characters in each name is 64
- Spaces are not allowed, but a full stop ( . ) or underscore ( _ ) can be used as a separator
- The last character of the name cannot be a full stop
- Dollar signs ( $ ), dashes ( - ), and slashes ( / ) are not allowed anywhere in the variable name
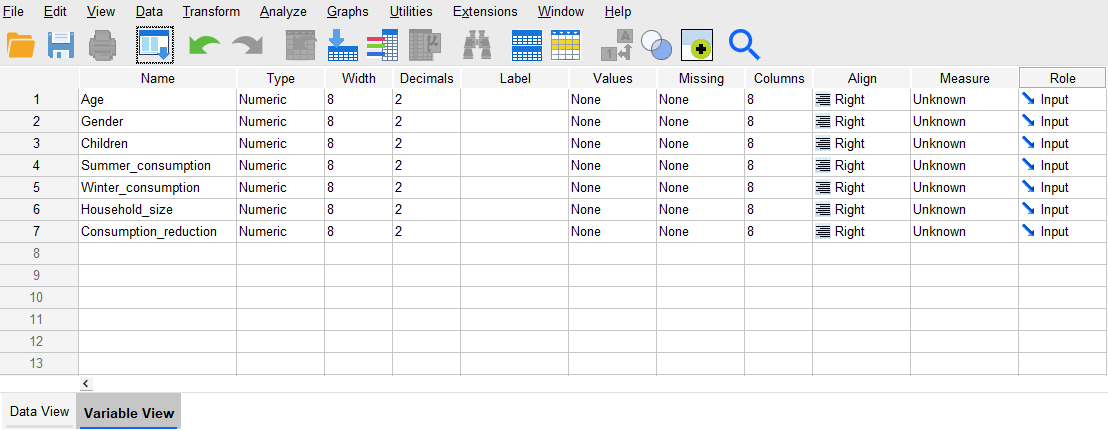
To enter the names of variables in the Variable View, go to the column headed Name and type in the name chosen for each variable. For this example, and for any other data you enter, this could be something that relates to the question (for example ‘Age’ for the first variable), it could be the question number (for example ‘Q1’; if you export data from Qualtrics the variable names will be the question numbers), or it could be anything else that makes sense to you. Just note that it is advisable to keep names to a sensible length, since there is only a finite space in the dialogue boxes to display them.
Once you have entered names, SPSS will automatically complete a number of other specifications for each variable by using a set of defaults. Some of the defaults may not be appropriate for the data but they can easily be altered. The Variable View for this example might now look something like:
Assigning labels to variables
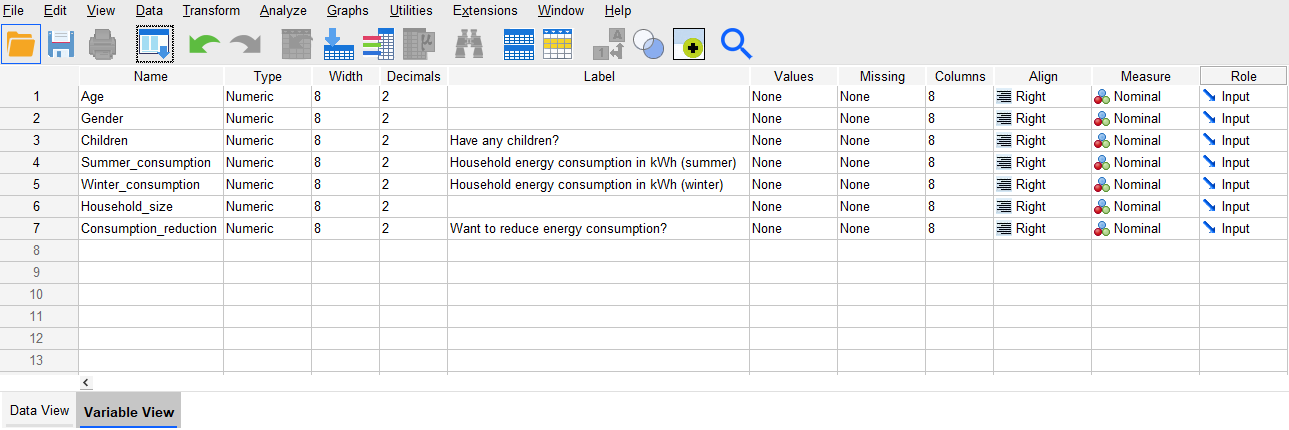
Because of the limit on the number of characters used in a variable name, the names can sometimes be rather cryptic. For example, the ‘Summer_consumption’ and ‘Winter_consumption’ variables don’t provide the complete picture about the nature of the variables in the example above. Adding some extra labelling, though, can make all the difference. To add this extra information in the Variable View, go to the column headed Label and enter labels for any variables that require them (the maximum number of characters is 256). Note that when working with data exported from Qualtrics the variable labels will automatically be the questions, but you can adjust these if wished.
Do this for the ‘Children’, ‘Summer_consumption’, ‘Winter_consumption’ and ‘Consumption_reduction’ variables for this example. The Variable View might now look something like:
Assigning labels to values for categorical variables
When entering data into SPSS, the convention is to use numbers to represent categories for categorical data (visit the Data and variable types page of the Introduction to statistics module for more information on categorical data if required). This avoids any potential typos when entering category names, and makes the statistical analysis more straightforward. These numbers can be anything that make sense to you, but it is important that you let SPSS know what category each number represents. You can do this by adding value labels for each categorical variable, by going to the column in the Variable View headed Values and clicking on the box with the ellipsis (three dots) for the relevant variable(s). This will open the Value Labels dialogue box, where you can enter values and labels as required (note again that if you are working with data exported from Qualtrics this will be done automatically).
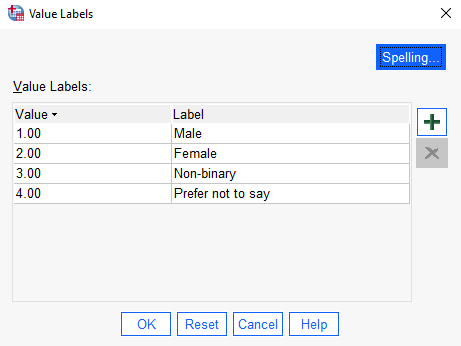
For example, for the ‘Gender’ variable in this example you could assign values 1 to 4 for each of the four categories listed, plus additional numbers for any extra categories as specified by participants, by doing the following in the Value Labels box:
- Click the plus sign
- Type the number 1 in the Value column
- Type the label ‘Male’ in the Label column
- Repeat the process for the values 2, 3 and 4, assigning labels of ‘Female’, ‘Non-binary’ and ‘Prefer not to say’ respectively (adding any extra numbers and categories as required)
- Click on OK
Alternatively, if you have an older version of the software you may need to do the following:
- Type the number 1 in the Value box
- Type the label ‘Male’ in the Label box
- Click on the Add button to move the label into the list box at the bottom
- Repeat the process for the values 2, 3 and 4, assigning labels of ‘Female’, ‘Non-binary’ and ‘Prefer not to say’ respectively (adding any extra numbers and categories as required)
- Click on OK
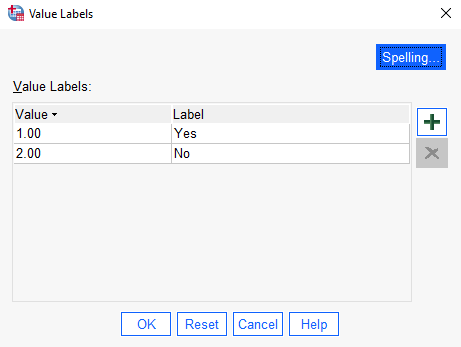
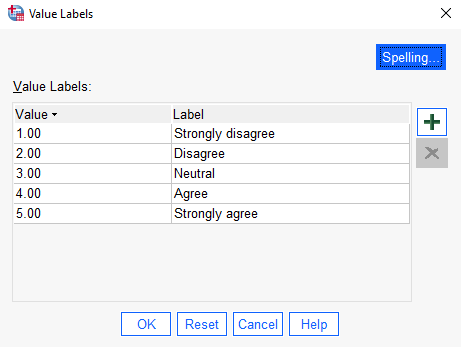
Do a similar thing for the other two categorical variables in this example (‘Children’ and ‘Consumption_reduction’). The completed Value Labels boxes should look something like the following (again, this may differ slightly depending on your version of the software):
Setting the data type
Another important change to make for each variable is to tell the software what type of data it contains. To do this in the Variable View go to the column headed Measure, where there are three options to choose from for each variable; Scale, Ordinal and Nominal. The ‘Gender’ and ‘Children’ variables in this example are nominal, as the categories don’t have any order to them, while ‘Consumption_reduction’ is ordinal. The other variables are measured on a scale (you can learn more about variable types in the Data and variable types page of the Introduction to statistics module).
To set the data type for the ‘Age’ variable, for example, do the following in the Measure column:
- Click on the cell corresponding to the ‘Age’ variable
- Click on the drop down arrow
- Choose the Scale option
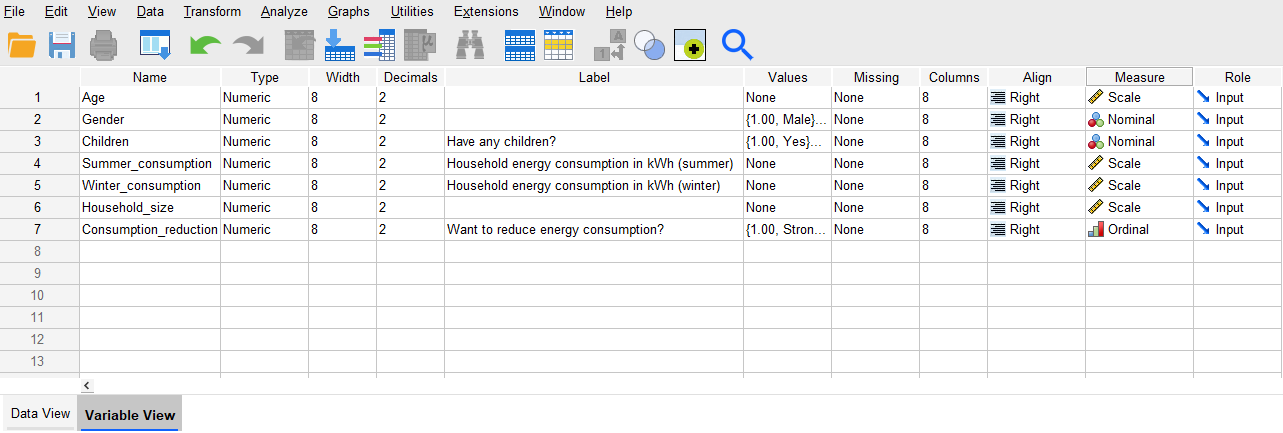
Once you have done this, change the settings for the other variables to the appropriate measure in the same way. The Variable View should now look like:
Other variable attributes
While the aforementioned columns are generally the most important ones to update in the Variable View, note that the others can also be updated if needed or desired. The remaining columns and their functions are:
-
Type: the type of data that the variable contains. This is usually Numeric data, even in the case of categorical data (as detailed above), but can be changed to a different type as required. For example, if you have open-ended text responses this would be String data.
-
Width: the number of characters each cell can contain in the Data View. The default is 8, which is usually plenty, but if you have big numbers, very small numbers with lots of decimal places, or string data with more than 8 characters, you will need to increase this. Alternatively, if you have an extremely large data file and are worried about the file size becoming too large you could always decrease this value if you don’t need 8 characters, but this is usually less of a concern.
-
Decimals: the number of decimal places each numeric value has. The default is 2, but again you should increase this if needed. You can also decrease it if you do not want to include unnecessary decimal places.
-
Missing: allows for the specification of values to represent missing data. While cells can just be left blank in the Data View when there is missing data, and hence this is optional, often it can be beneficial to assign values to represent missing data so that it is clear that it hasn’t simply been skipped over. For example, rather than leaving a cell blank you may choose to assign a value such as 999 or -1 to represent missing data, and then you would enter this value instead. Multiple missing values can be assigned for different purposes if required, such as to represent missing data for a question that wasn’t relevant to the participant, versus missing data for a question that they should have answered.
-
Columns: the width of the column in the Data View, which can also be adjusted manually in the Data View by simply dragging the column.
-
Align: whether the data is left, centre or right aligned in the Data View.
-
Role: roles can be assigned to variables such as ‘Input’ or ‘Target’, although generally this is not required.
Entering and saving data
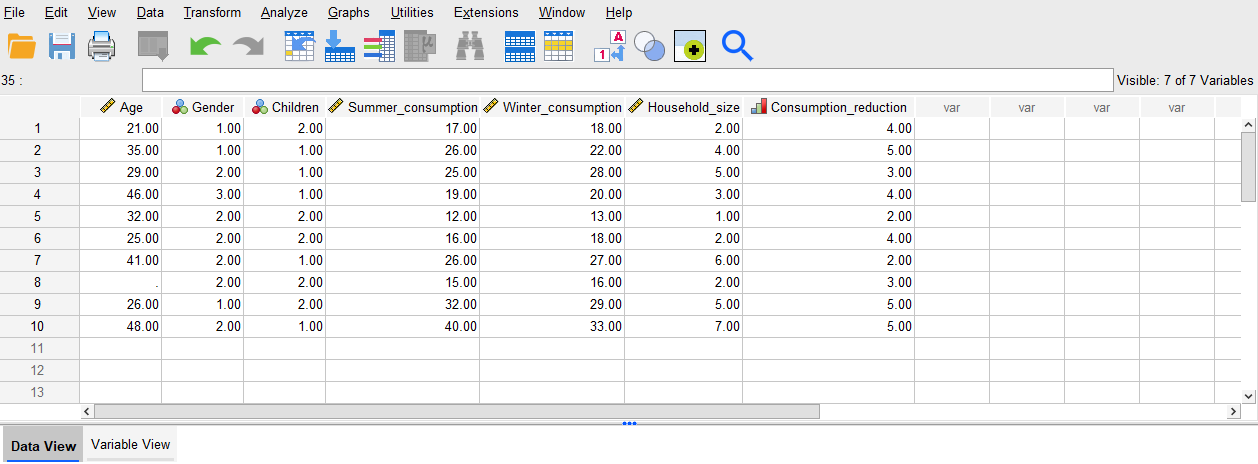
Having entered variable names in the Variable View, note that the columns in the Data View now automatically have those names as the headings (along with symbols to represent the measure). All that remains now is to key in the data, if required, so for this example enter the following in the Data View (either row by row, or column by column as preferred). Alternatively, you can download the data file attached below rather than entering the data.
Download this sample data file rather than entering the data above, if preferred:
In both cases, note the blank cell for the missing ‘Age’ data for case 8. If missing values had been set up, the missing value could be entered there instead (for example, 999 could be entered if that was assigned as a value to represent missing data).
Also note that you can see the value labels assigned to categorical variables if preferred, rather than the category numbers, by selecting the Value Labels icon available on the menu in the Data View:
![]()
Once a data file has been created, it can be saved in the usual way by going to File, Save As… and choosing a location and name. This will save as a .sav file type. When working in SPSS it is likely that you will also need to save other file types as well, such as output and syntax, but these will be covered in subsequent pages of this module.