Introduction to NVivo
When you launch NVivo for the first time you will be prompted to set up your user profile. To do this, just enter your name or ID and initials and select a language, then press ‘OK’. Once you have done this you can get started exploring the NVivo workspace, as detailed in this page.
In brief, it covers the following:
- The different NVivo sample projects available for use
- The key components of the NVivo workspace
- The three different folders for storing and summarising project materials
- How to organise data within these folders
NVivo sample projects
NVivo comes complete with a few different sample projects, which are great for exploring and experimenting with before you start on your own project. Links to two of these projects are displayed at the top of the screen when you launch NVivo, and you can also select the link to view more sample projects. For parts of this module we will work with the first sample project (the multi-method project), which is called Environmental Change Down East. Select this project to open it now.
Note that upon opening this project, or any project, you will be presented with the opportunity to take a tour of the software. For the time being click on ‘Skip tour’, but to view it at a later time go to: File > Help > Help Resources > Tour
The NVivo workspace
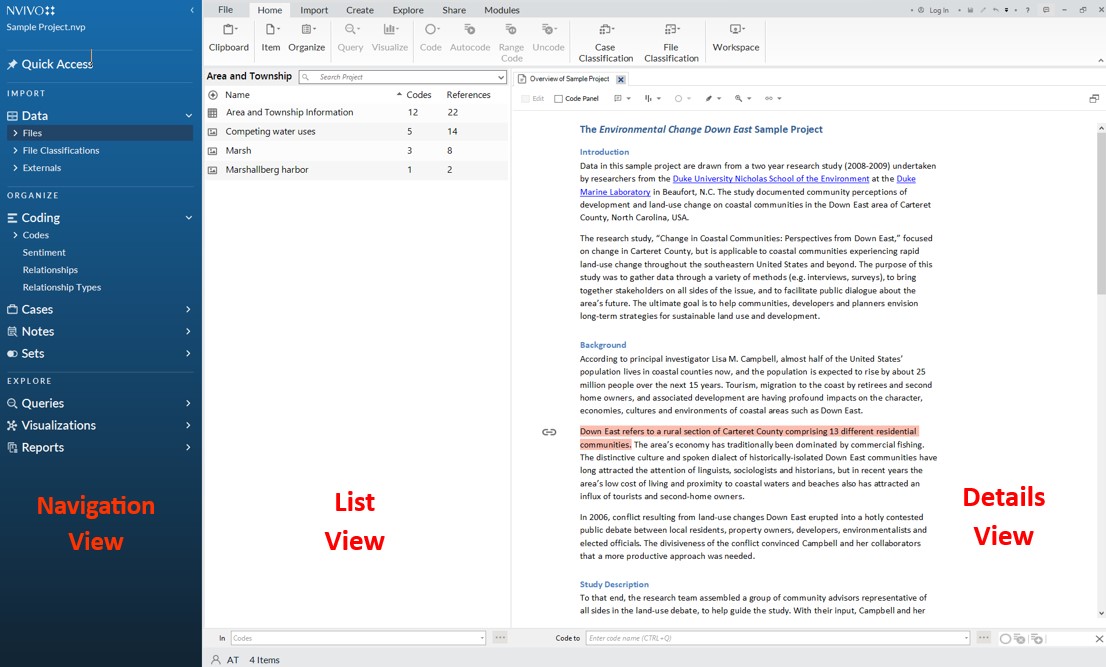
Once the sample project has opened you can explore the NVivo workspace. For example, you may wish to double click on the Overview of Sample Project document to open it and read about the sample project. When you do this you will notice there are three different views, as described and shown below:
- The Navigation View on the left of screen displays groups and folders. For example, there is a ‘Data’ group which contains Files, File Classifications and Externals folders (detailed in the next section), and within each of these are sub-folders containing the data for the sample project.
- The List View in the middle of the screen lists the contents of the folder selected in the Navigation View. For example, when the Files folder is selected the List View shows the Overview of Sample Project document (the only document in the parent Files folder; others have been organised into sub-folders).
- The Details View on the right of screen displays open project items. For example, the Overview of Sample Project document opened previously.
Close the Overview of Sample Project document when you are finished with it (note that while you can have multiple windows open in the Details View, to avoid confusion it is generally best to keep these to a minimum).
Types of data
The ‘Data’ group in the Navigation View contains three folders where all of the data (i.e. project materials) are stored. These folders are detailed below, and you are encouraged to have a look in each to see what has been included for the sample project:
- Files is where you should import or create materials for your project, organising them into sub-folders as desired.
- File Classifications is where you can summarise general information about the materials in your project using classifications - either predefined ones or ones you have created or imported (for more on classifications see the Classifications page of this module).
- Externals is where you can summarise materials you cannot import into your project (e.g. books).
Organising data
When importing materials into NVivo you can create your own folders and sub-folders according to how you wish to organise your data. For the sample project, for example, the folders and sub-folders that have been used to store the project materials in the Files folder are:
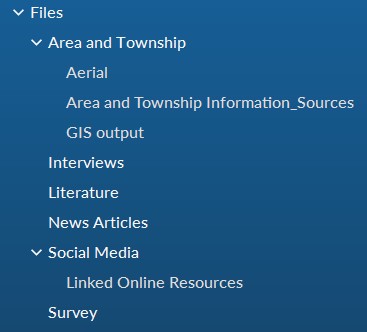
By exploring these folders (which you can do by clicking the relevant ‘>’ icons) you can see the different types of materials that can be imported into NVivo; from text documents and PDFs to images, audio files, video files, social media content and survey data.